Twitterの特定ユーザーのツイートを自動でお知らせするプログラムを作る。Twitterを定期的に訪れると思いがけない情報に触れることができる反面、知りたくもない情報の洪水に流され時間が過ぎていくことが多い。お気に入りユーザーのツイートを短時間で知るためのLambdaを作った。先月から自動的にメールが来るようにしたが非常に満足している。
目次
Twitter開発者アカウントの登録(申請不要)
Googleで検索すると申請が必要と書かれていることがあり、面倒だな・・と思っていたが、実際は申請不要であることがわかった。
https://developer.twitter.com/en から「Sign up」をクリック。ログイン画面が出てくるので、お手持ちのTwitterアカウントでログインする。
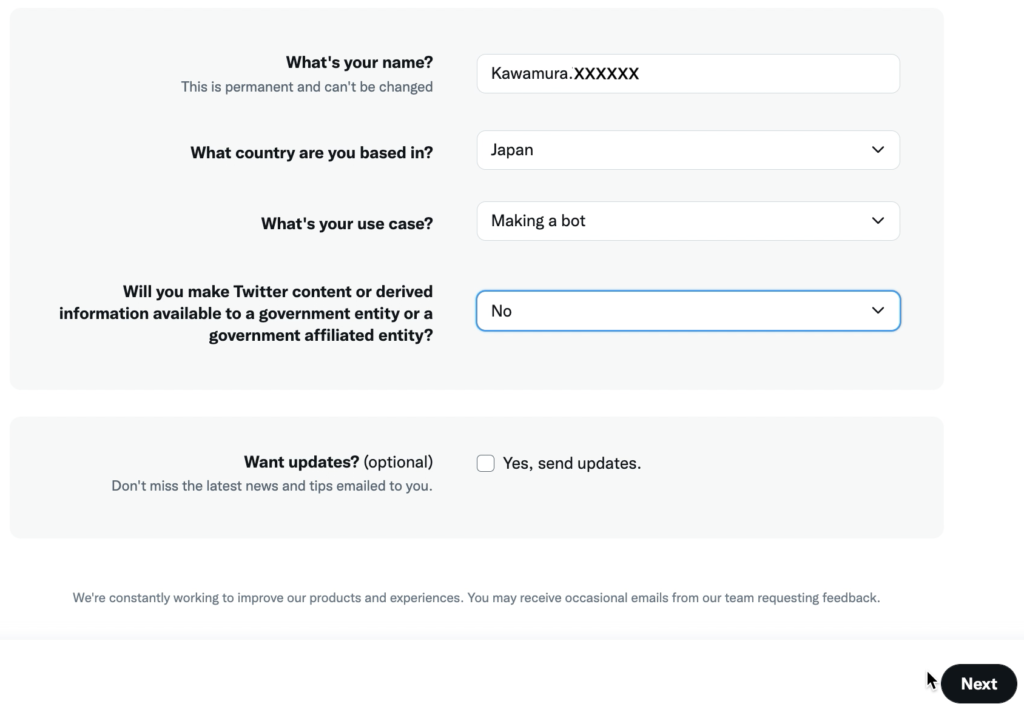
入力画面が表示される。

名前、国、目的を入力する。「Will you make Twitter content or derived information available to a government entity or a government affiliated entity?(Twitterのコンテンツや派生情報を政府機関や政府関連機関が利用できるようにしますか?)」は「No」を選択。「Next」ボタンをクリック。
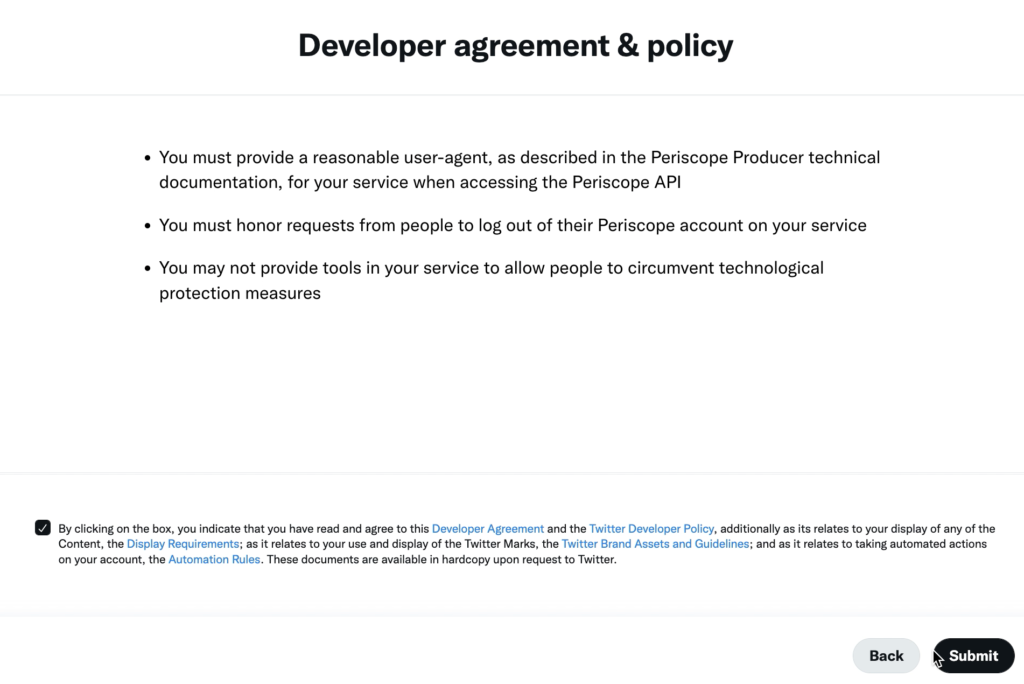
利用規約に同意するチェックボックスをつけ、「Submit」ボタンをクリック。
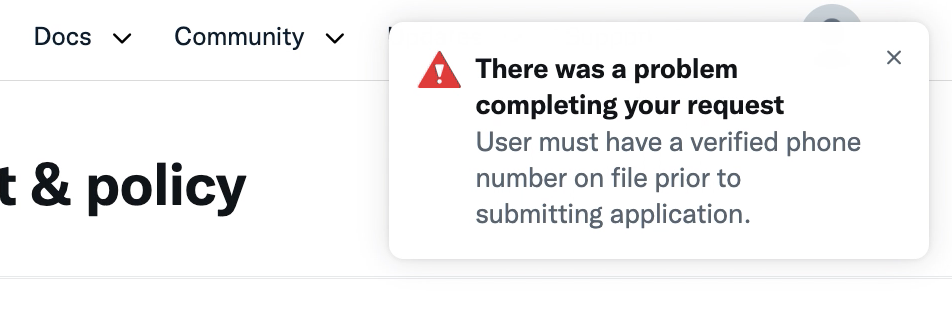
なにやらエラーが・・。「There was a problem completing your request. User must have a verified phone number on file prior to submitting application.(リクエストの完了に問題が発生しました。アプリケーションを送信する前に、確認された電話番号を登録する必要があります。)」なるほど、Twitterアカウントに電話番号を登録する必要があるらしい。
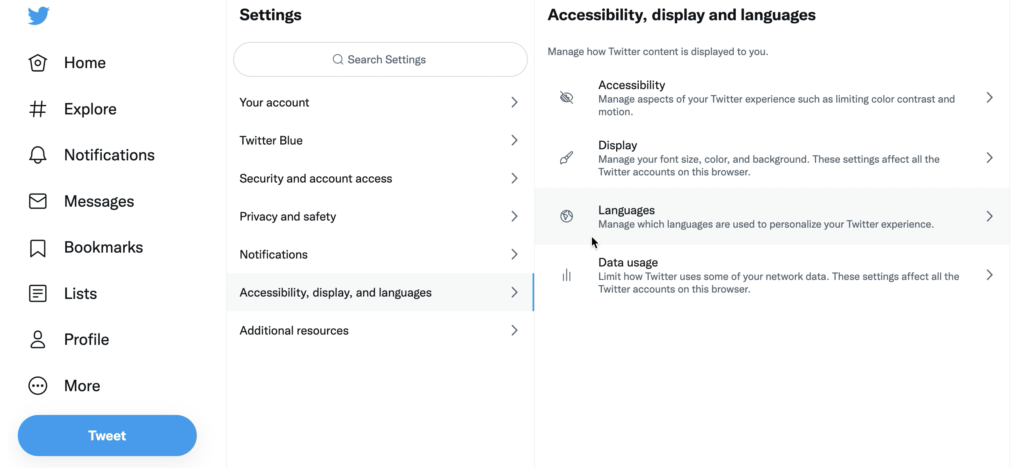
https://twitter.com/settings/account を見ると英語になっているので、まずは日本語にする。
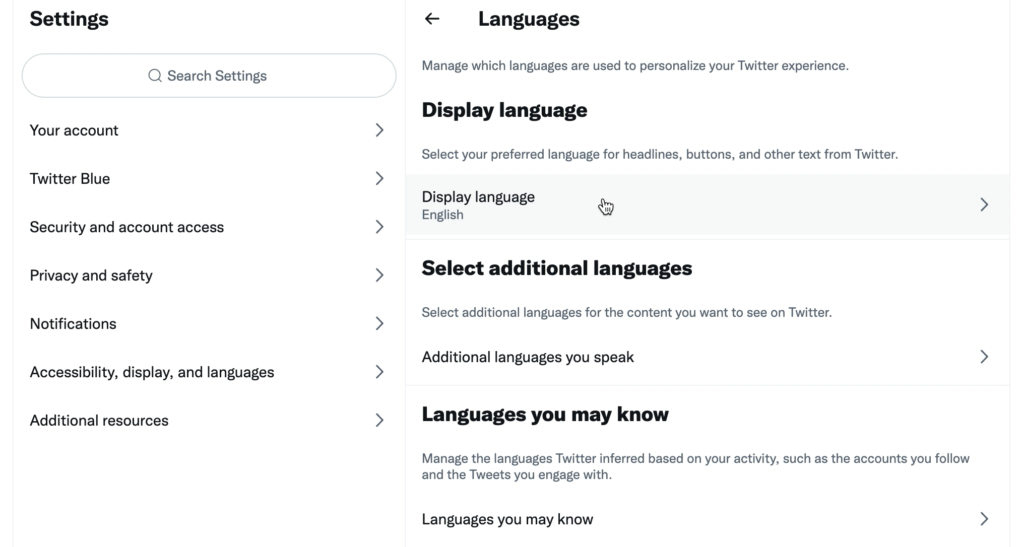
「Accessibility, display, and languages」>「Languages」。
「Display language」をクリック。
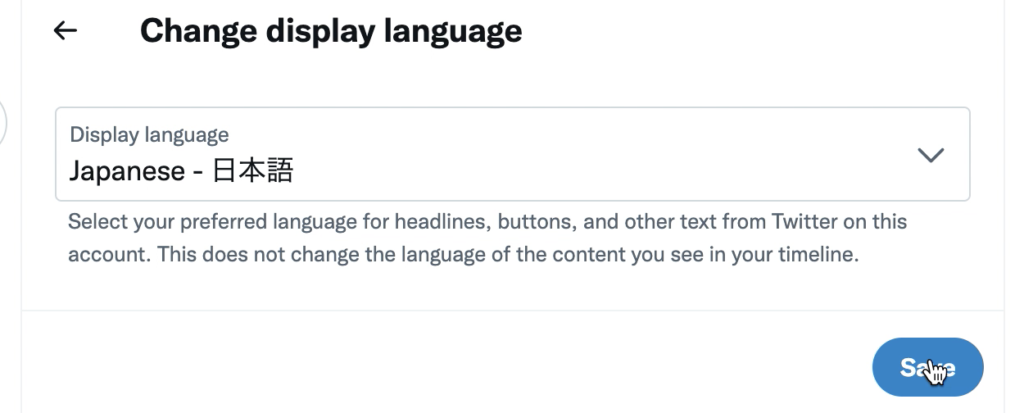
「Japanese – 日本語」を選択。
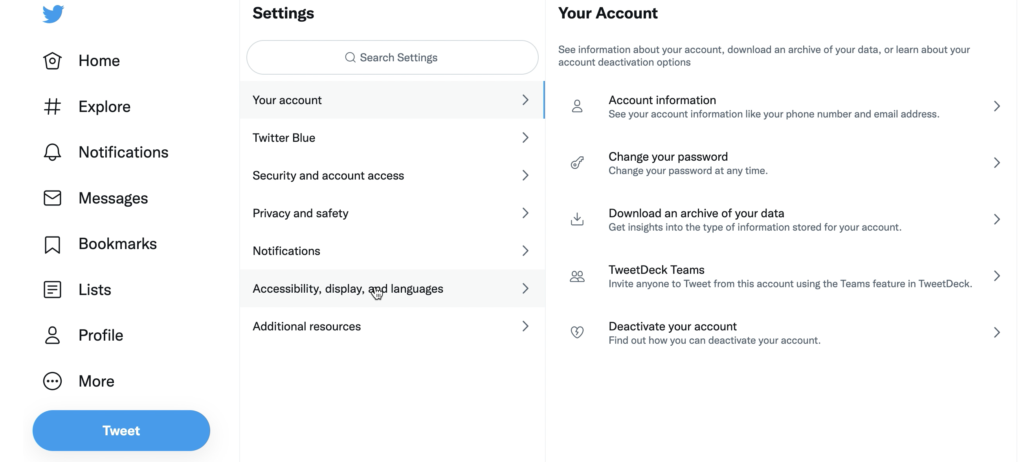
次に「アカウント情報」をクリック。
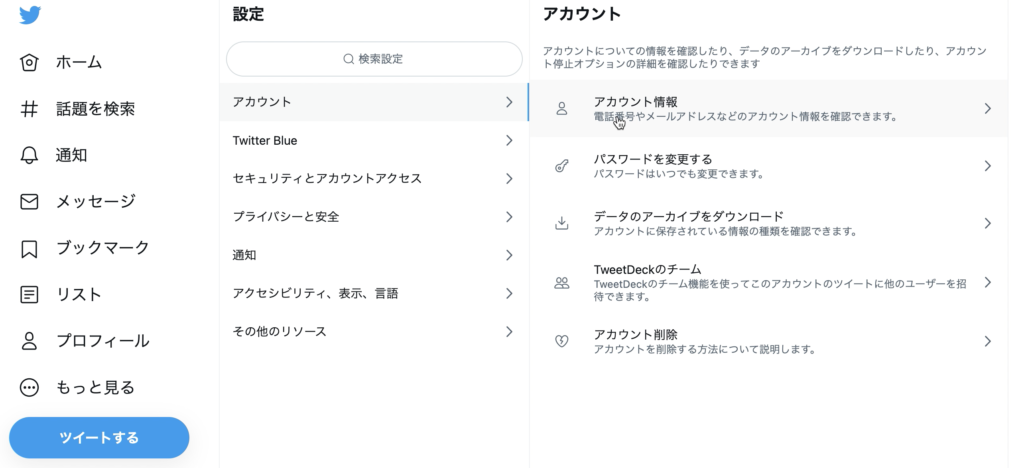
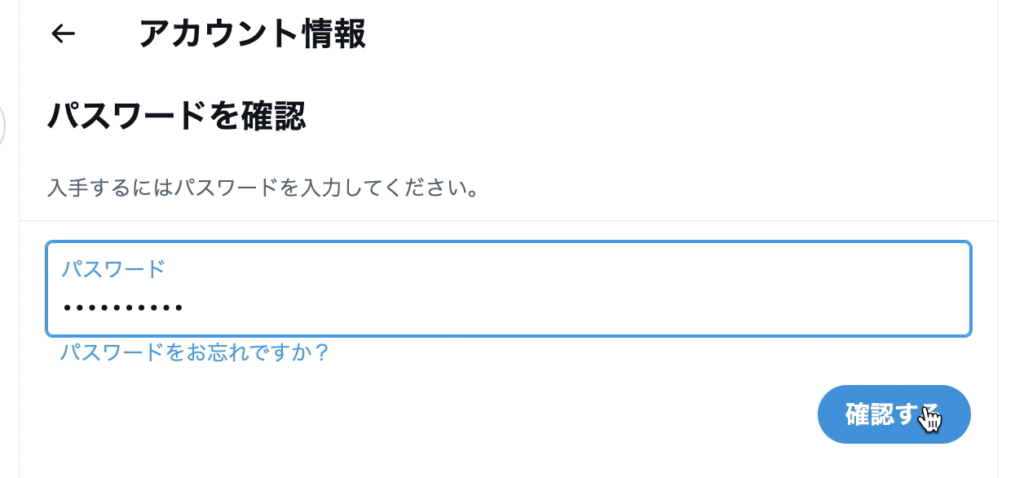
パスワードを入力。
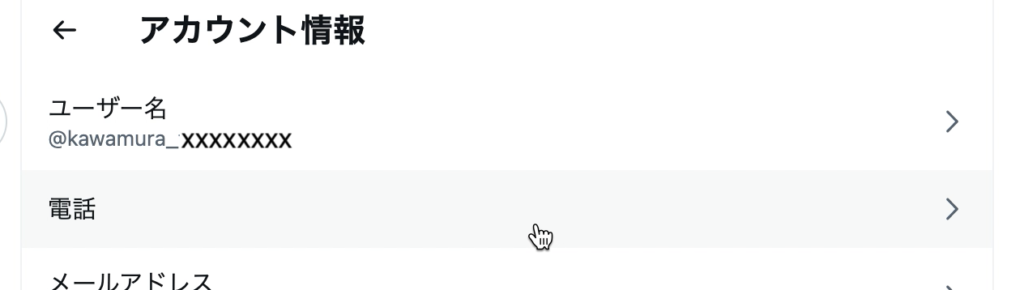
「電話」をクリック。
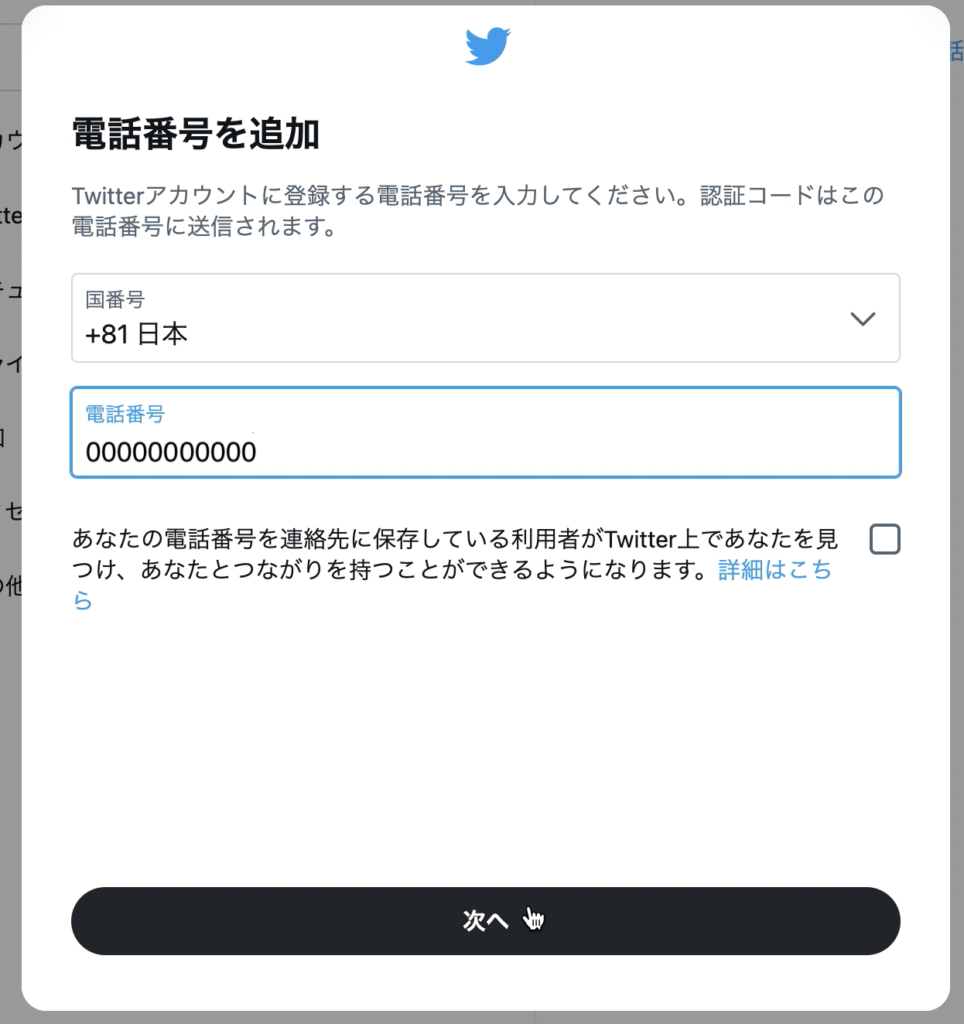
「電話番号を追加」をクリック。

パスワードを入力。

電話番号を入力。
電話番号に認証コードを送ってよいかと聞かれる。「OK」クリック。
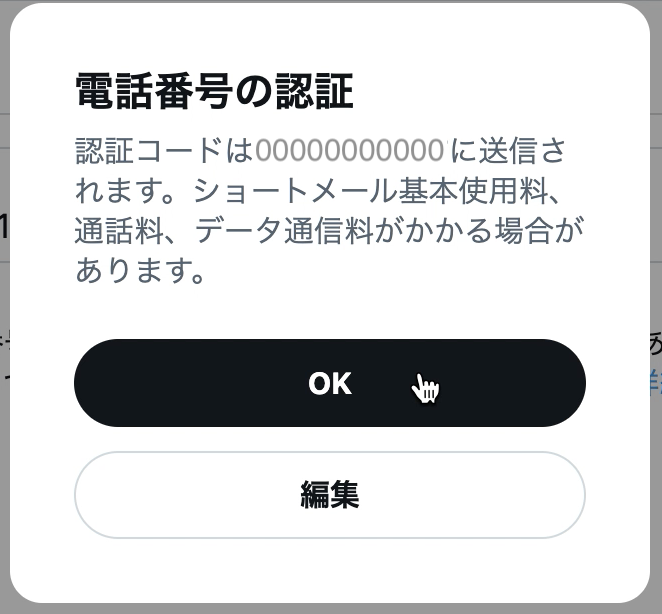
届いた認証コードを入力して「認証」ボタンクリック。
https://developer.twitter.com/en/portal/petition/essential/basic-info に戻る。なにやらメッセージが出ている。「Refresh」ボタンをクリック。

再度入力して「Next」ボタンクリック。
規約に同意して「Submit」ボタンクリック。
確認メールを送信したと出る。
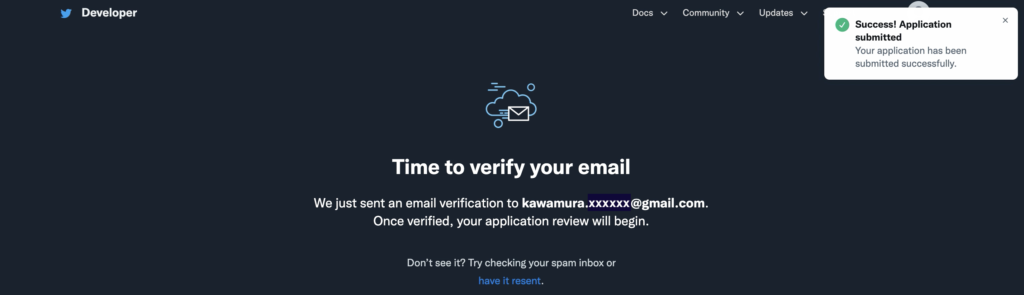
メールが届いているので「Confirm your email」ボタンをクリック。
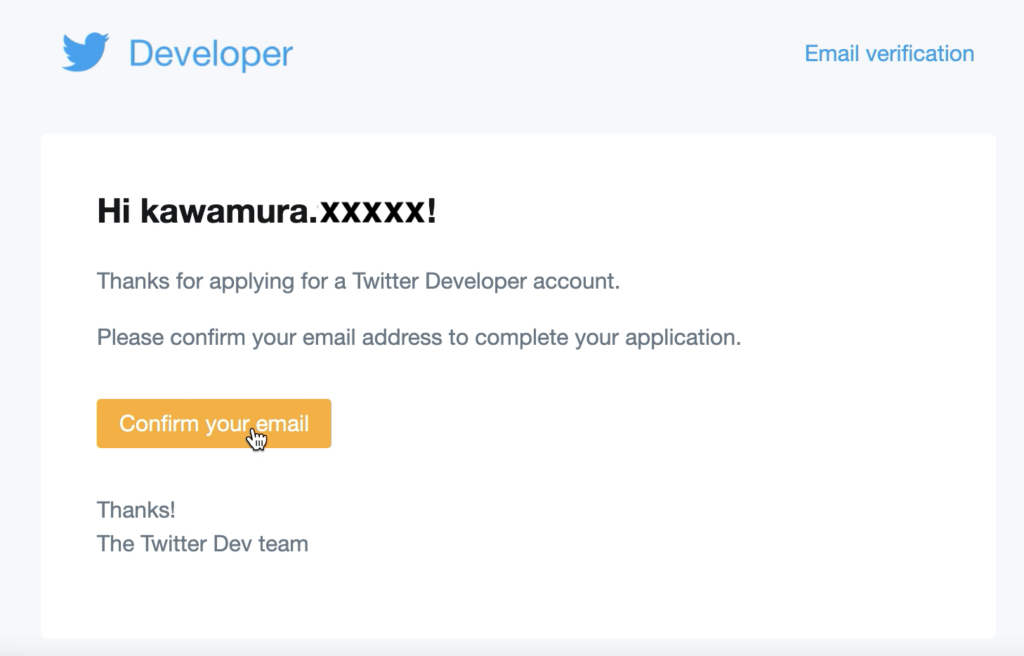
ようやくTwitter Developer Platform のアカウントが開設できた。
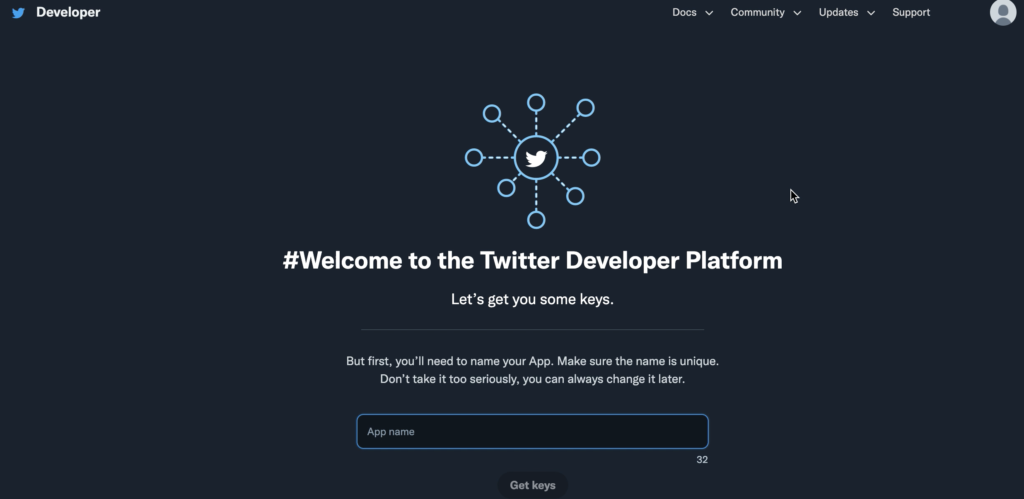
APIキーの取得
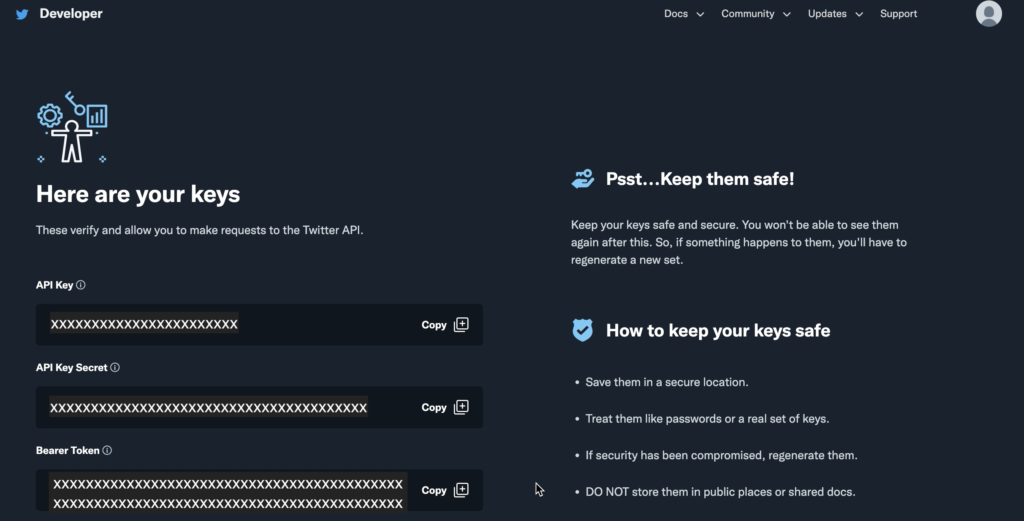
「後でも変更できるからアプリの名前を入力してね」と言われるので入力し、「Get keys」ボタンをクリックすると、アプリのキー(API Key、API Key Secret、Bearer Token)が発行される。
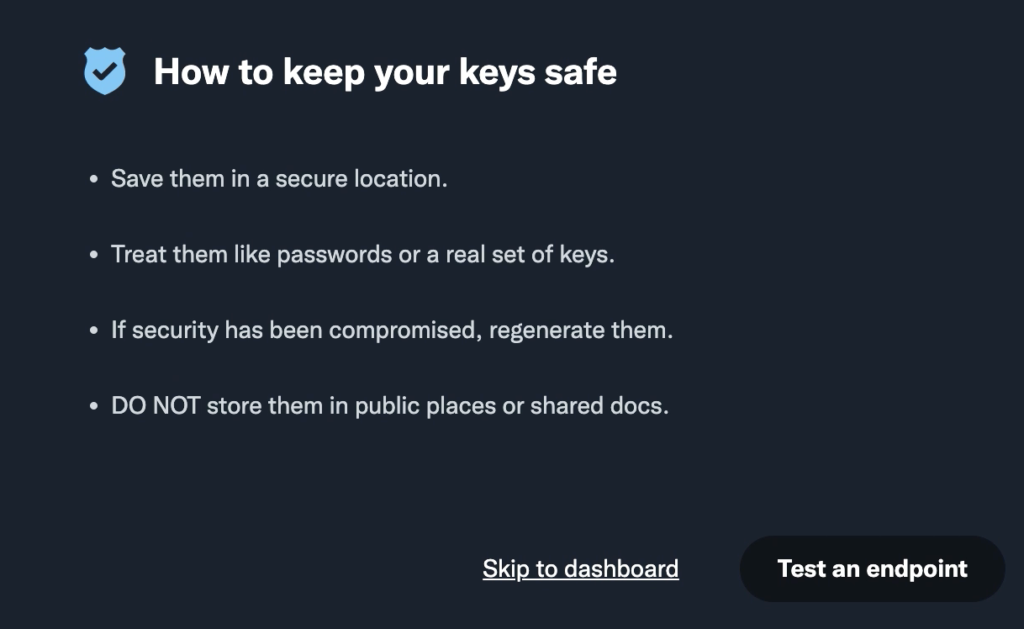
「Test an endpoint」をクリック。
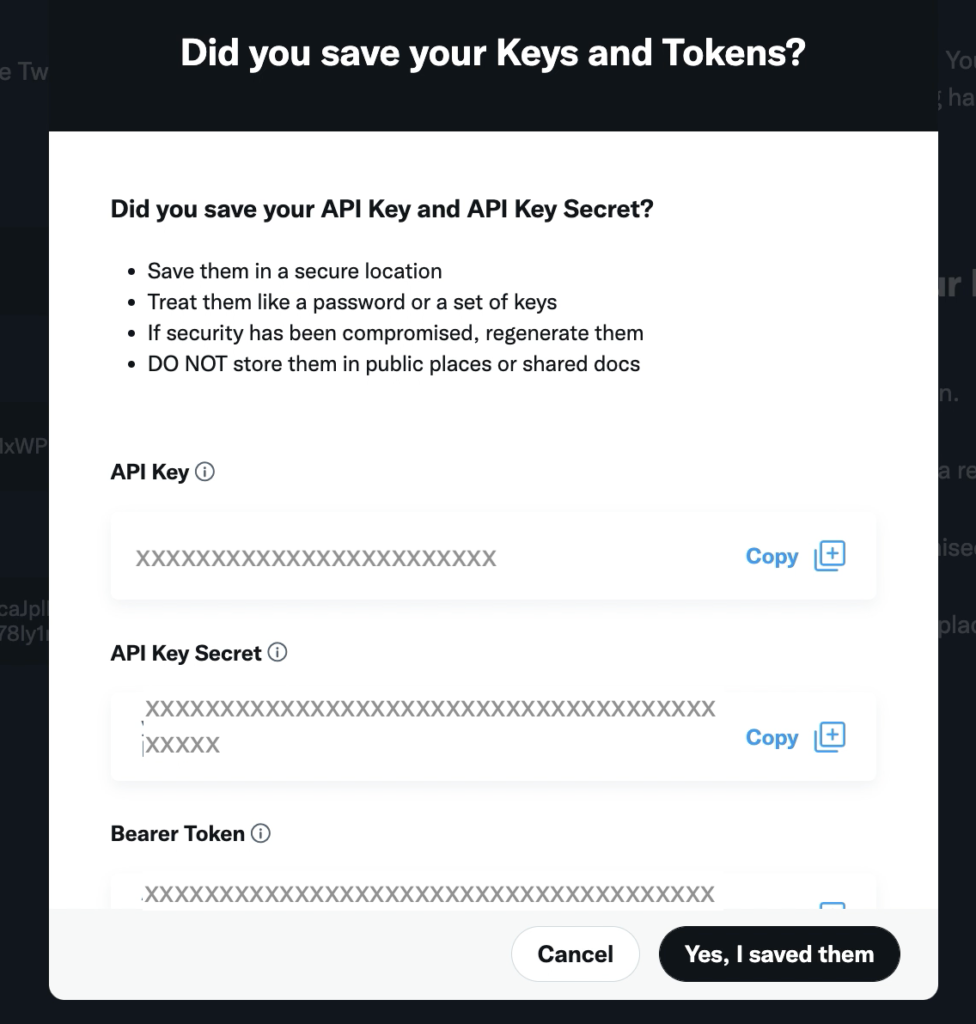
「KeysとTokensを保存しましたね?」と聞かれるCopyしてテキストエディタに貼り付けておく。その後、「Yes, I saved them」をクリック。
「試してみよう!」と言われるがよくわからない。結局「Skip to dashboard」をクリック。
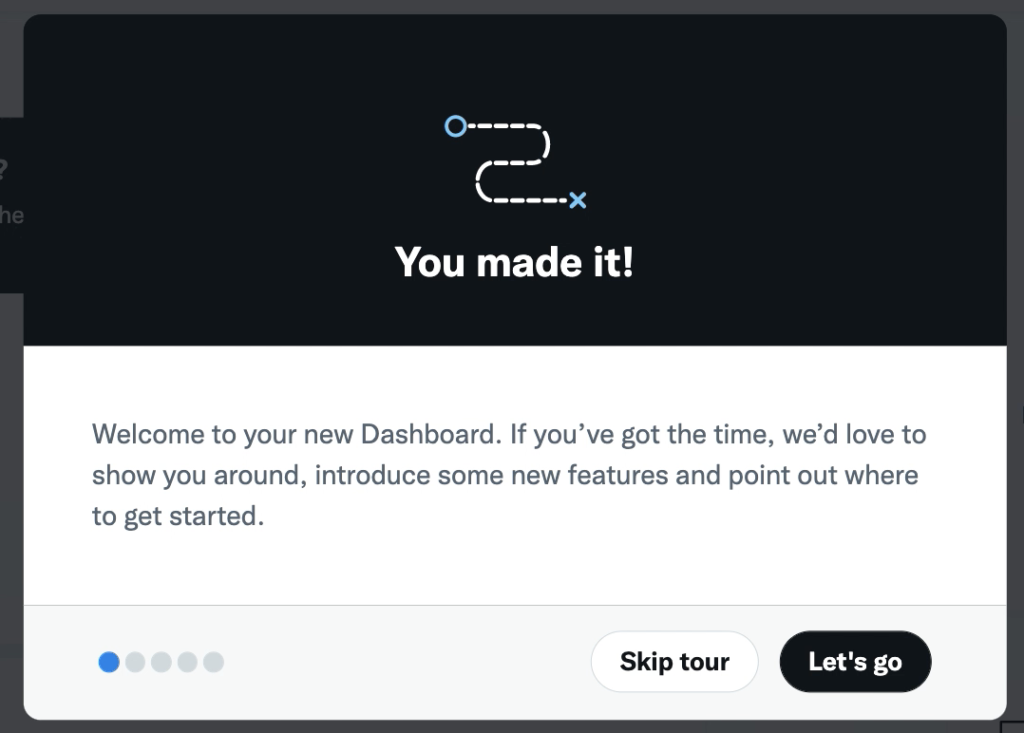
ガイダンスが出る。
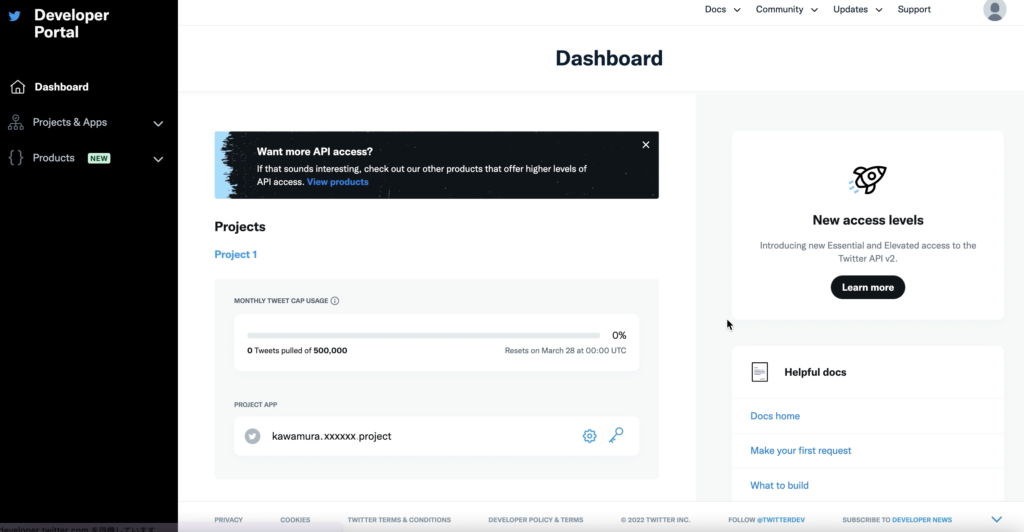
ようやく完了。ダッシュボードが表示される。
権限設定
このあと、tweepyで簡単なプログラムを作ったのだが、これだけでプログラムは動かなかった。以下の403 Forbiddenエラーが発生。
Traceback (most recent call last):
  File "twitter.py", line 34, in <module>
    result = api.home_timeline(count=1)
  File "/Users/../python3.8/site-packages/tweepy/api.py", line 33, in wrapper
    return method(*args, **kwargs)
  File "/Users/../python3.8/site-packages/tweepy/api.py", line 46, in wrapper
    return method(*args, **kwargs)
  File "/Users/../python3.8/site-packages/tweepy/api.py", line 488, in home_timeline
    return self.request(
  File "/Users/../python3.8/site-packages/tweepy/api.py", line 259, in request
    raise Forbidden(resp)
tweepy.errors.Forbidden: 403 Forbidden
453 - You currently have Essential access which includes access to Twitter API v2 endpoints only. If you need access to this endpoint, you’ll need to apply for Elevated access via the Developer Portal. You can learn more here: https://developer.twitter.com/en/docs/twitter-api/getting-started/about-twitter-api#v2-access-leve
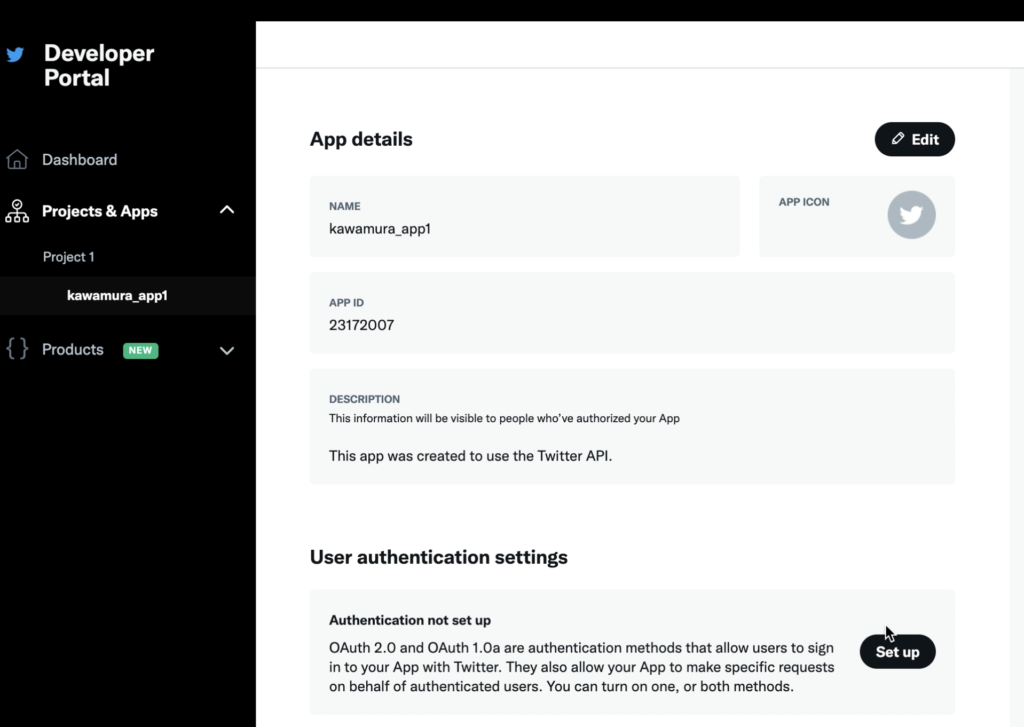
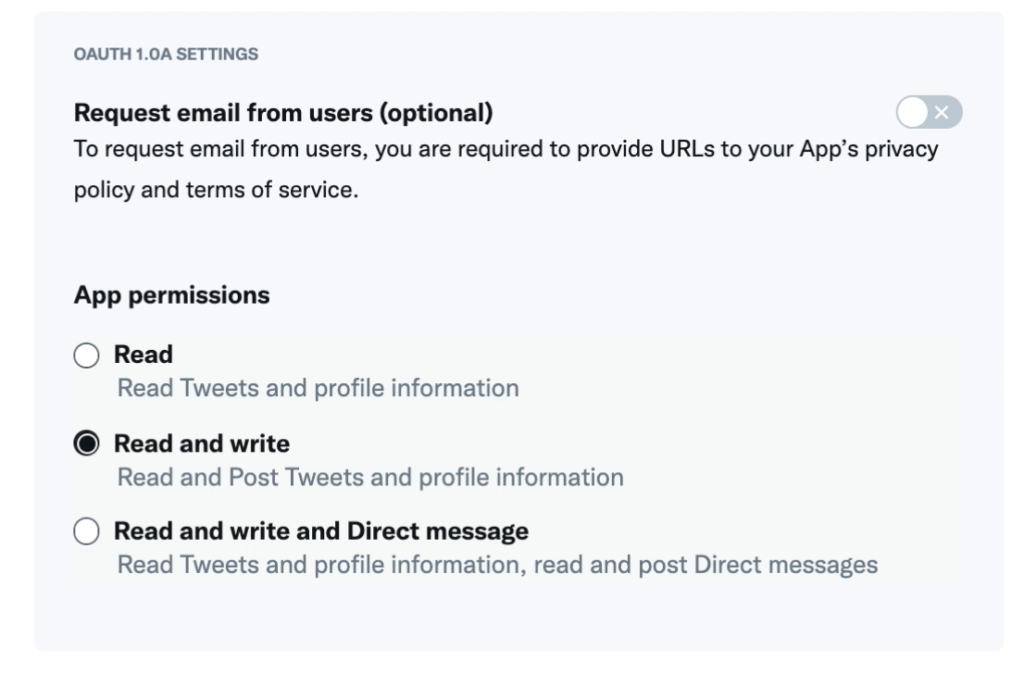
権限設定を行う。Developer Portal の左メニューのプロジェクト名を選択。「User authentication settings」の「Set Up」ボタンをクリック。
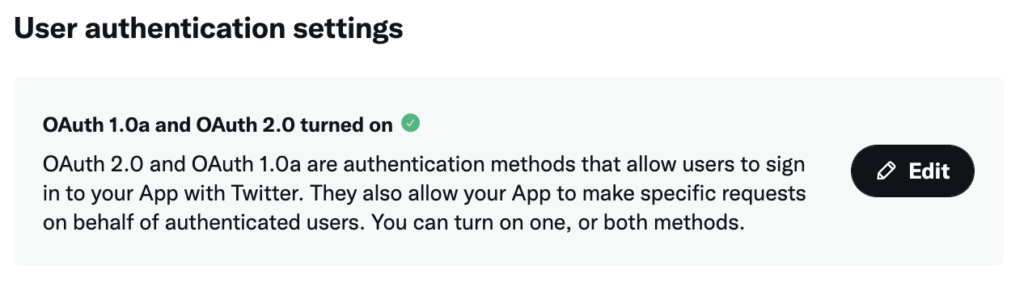
権限の付与を行う。「OAuth 2.0」と「OAuth 1.0a」のスライダーをONにする。
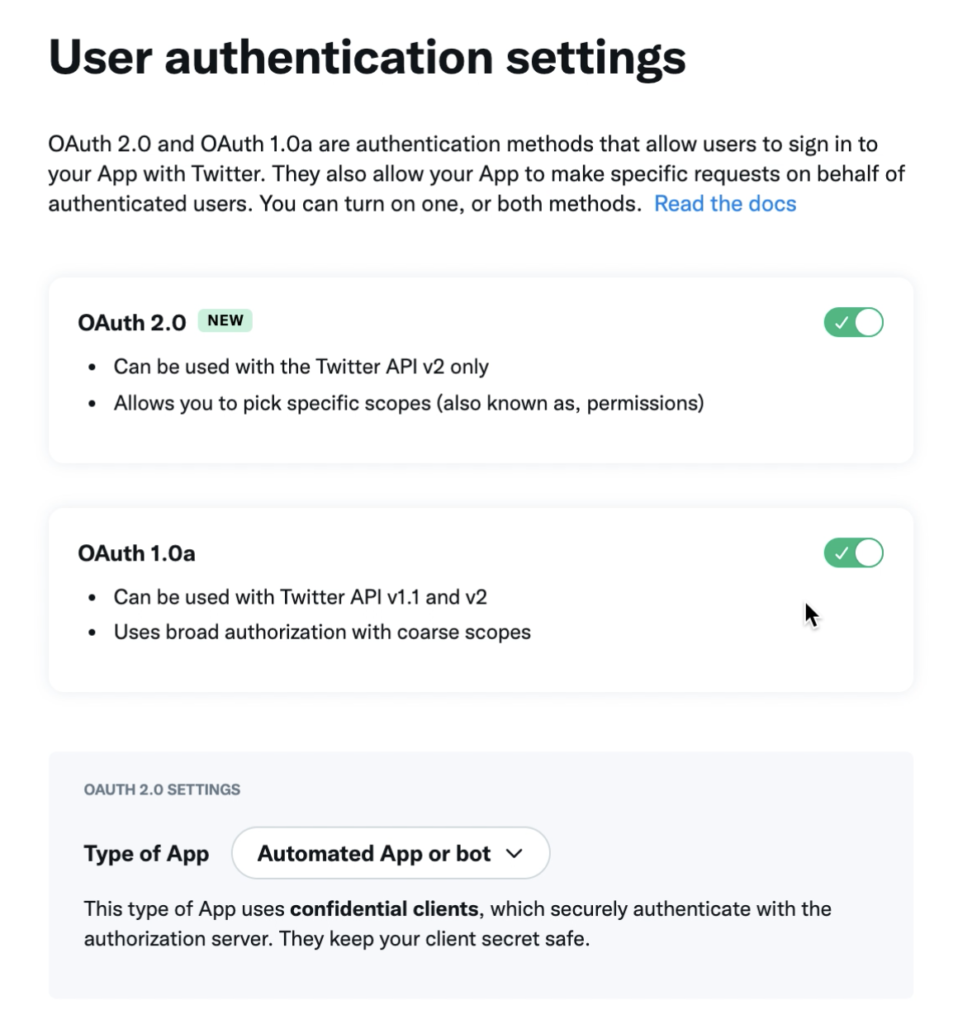
「App permissions」を「Read and write」を選択。
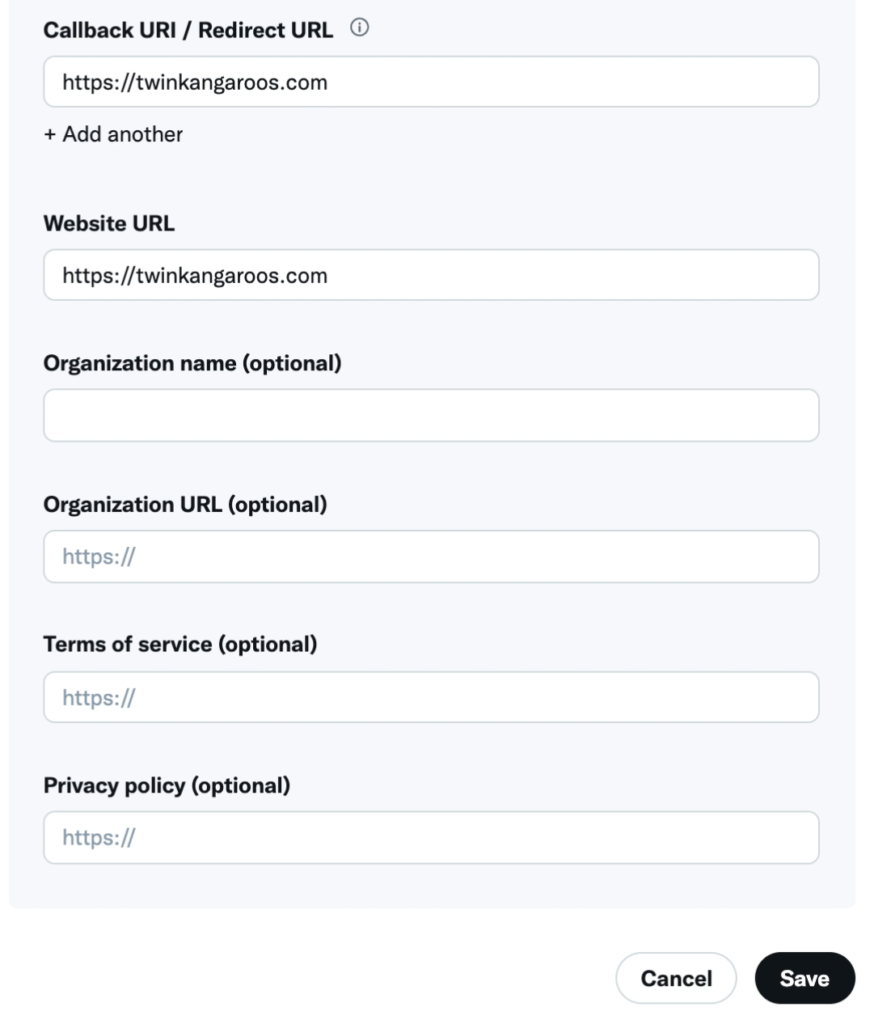
「Callback URL / Redirect URL」を入力。「!」の説明を見る。
Callback URLs are destinations that OAuth is allowed to redirect after the authentication process. It is important to identify your callback URLs so that OAuth recognizes the specified URLs as valid.訳すと、「コールバックURLは、認証処理後にOAuthがリダイレクトを許可する先です。OAuthが指定されたURLを有効なものとして認識するため、コールバックURLの特定は重要です。」よくわからないままいったん入力する。(今回OAuthを使わないのでなんでもよい)
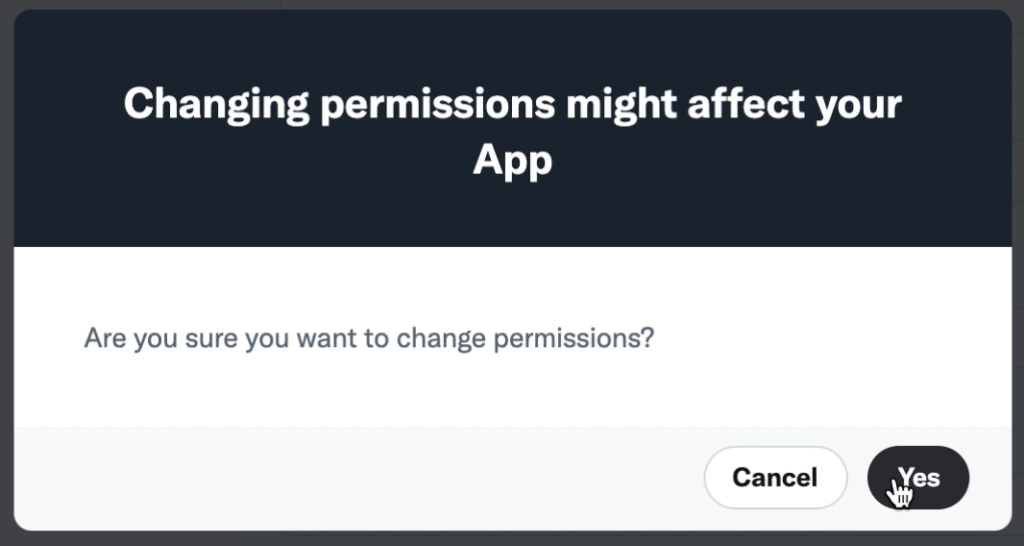
権限の変更を確認されるので「Yes」クリック。
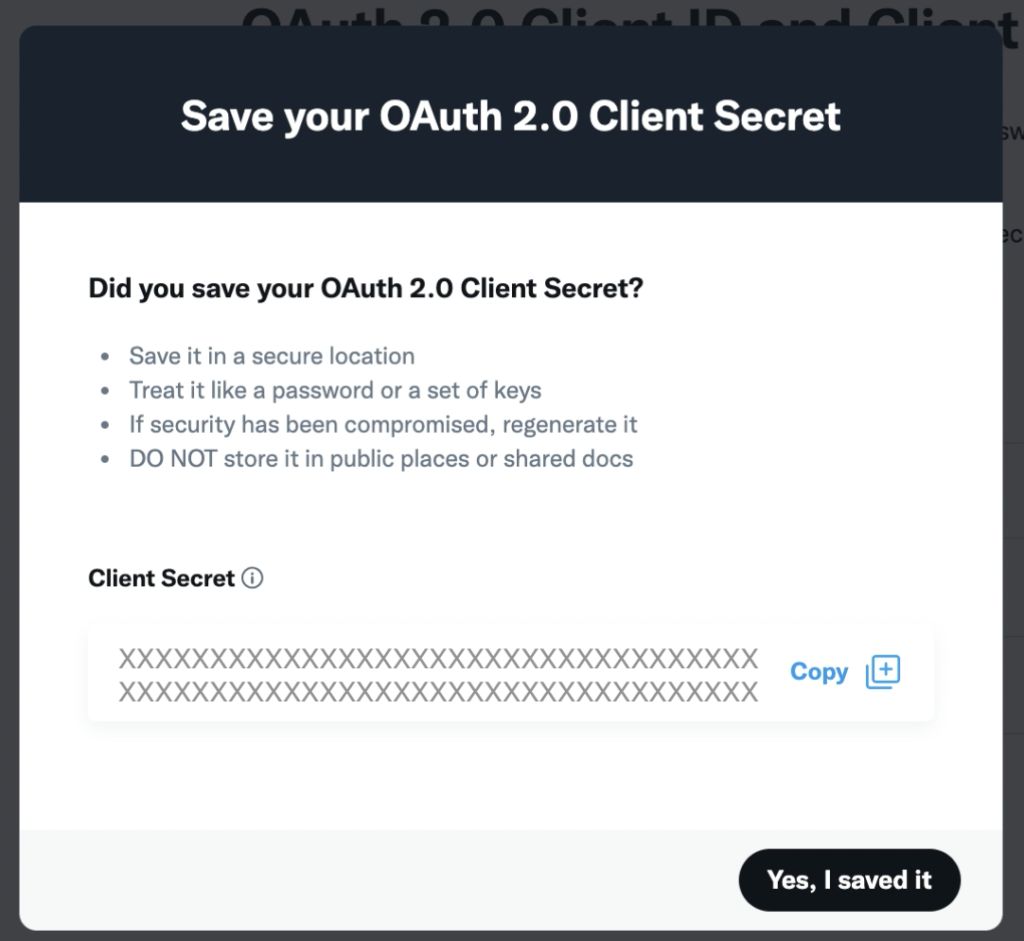
「Client ID」「Client Secret」をメモする。ただし今回は使わない。
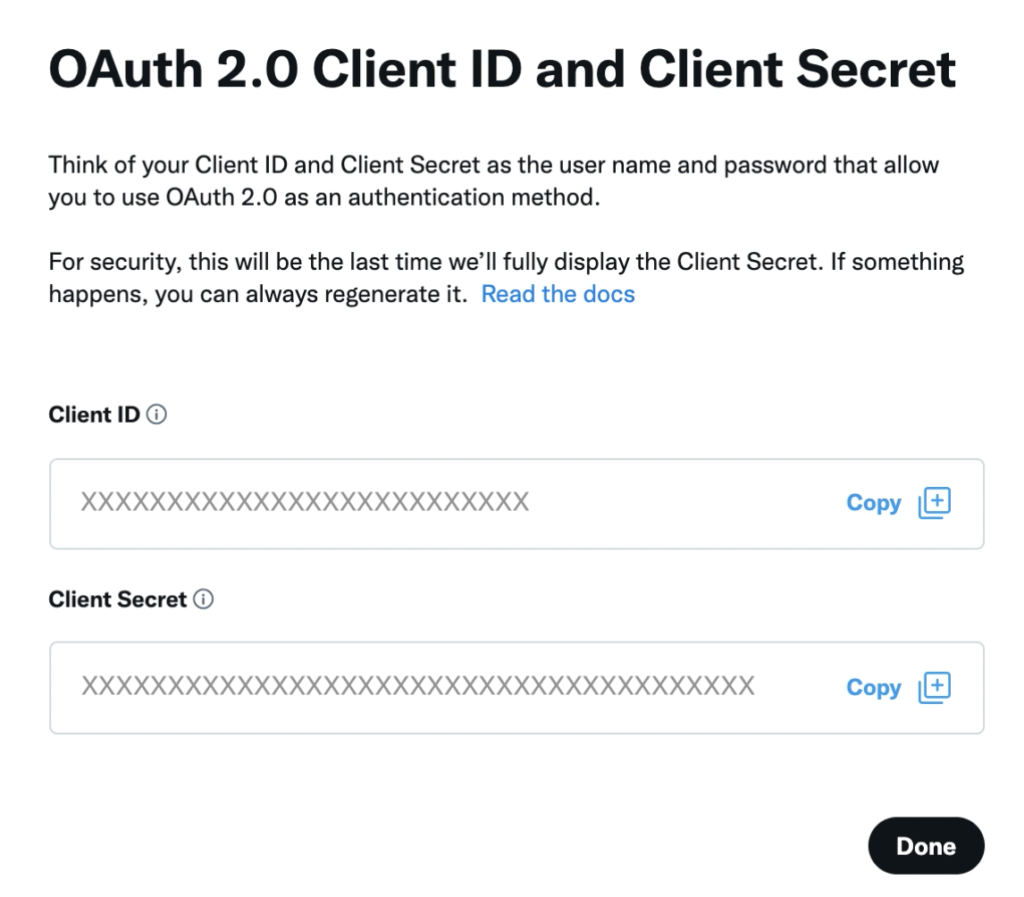
再度聞いてくるのでメモしたら「Yes, I saved it」をクリック。
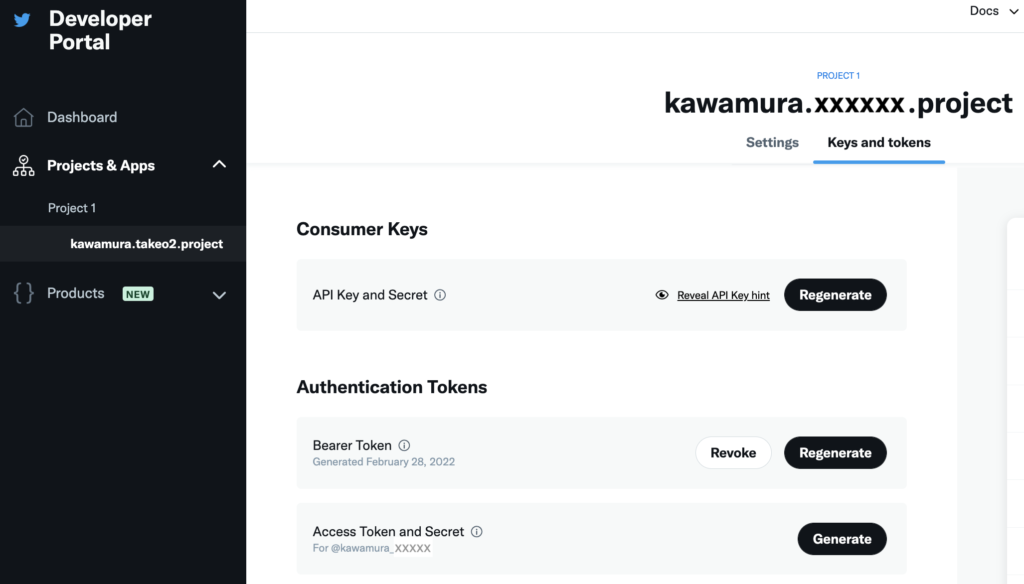
このようになる。あとで変更できるようだ。
「Keys and tokens」タブから「Access Token and Secret」の「Generate」ボタンクリック。
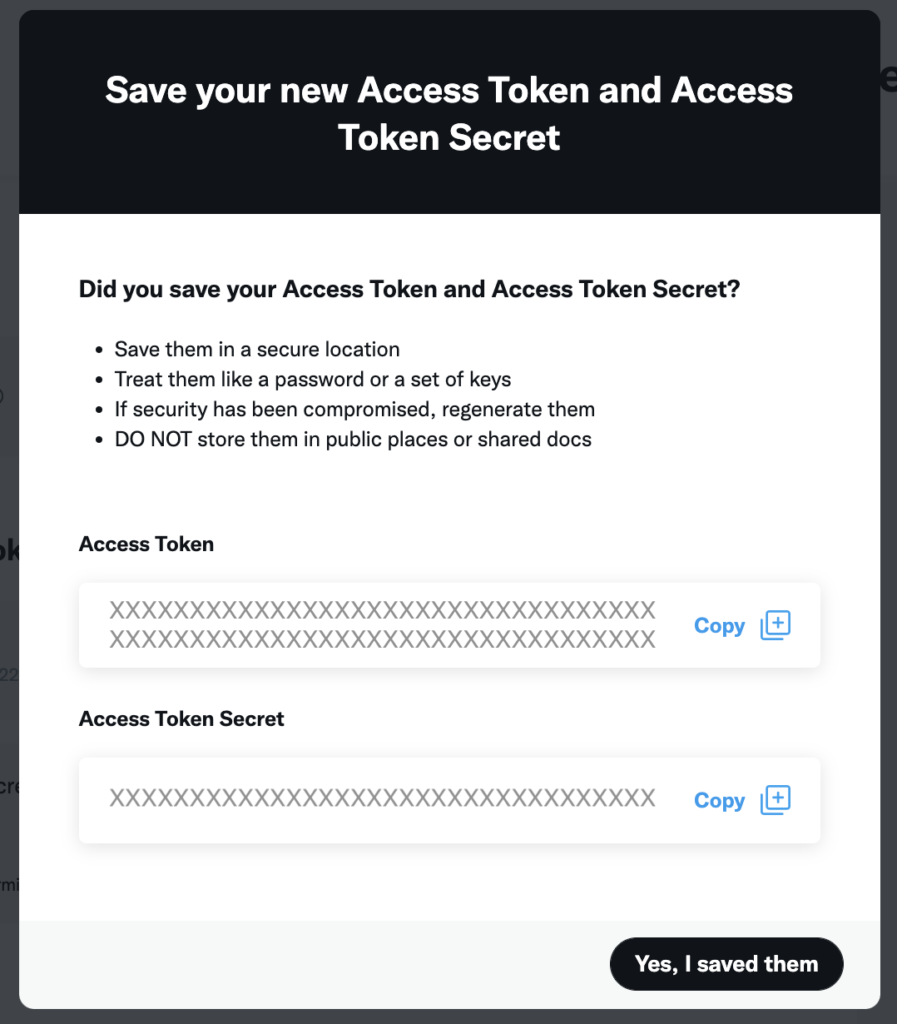
「Access Token」「Access Token Secret」をメモして「Yes, I saved them」。
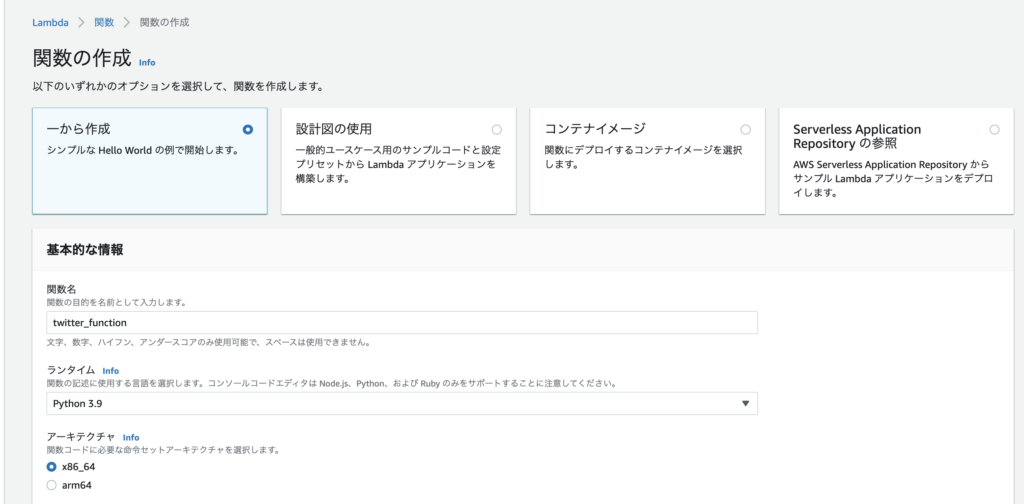
Lambda関数を追加
いよいよ準備が整ったので、Lambda関数を作成する。ランタイムは「Python3.9」。
以前のBeautifulSoapの方法ようにレイヤーに追加した後、以下を呼び出したがうまくいかない。
import tweepy以下のエラーが発生する。
[ERROR] Runtime.ImportModuleError: Unable to import module 'lambda_function': No module named 'tweepy'原因不明のため、zipファイルに圧縮してアップすることにした(幸い、ファイルサイズは小さいため、アップ後はブラウザ上で編集できる)。
Tweepyライブラリのダウンロード・アップロード
ターミナルから以下を実行し、Tweepyをダウンロードする。
mkdir tweepy
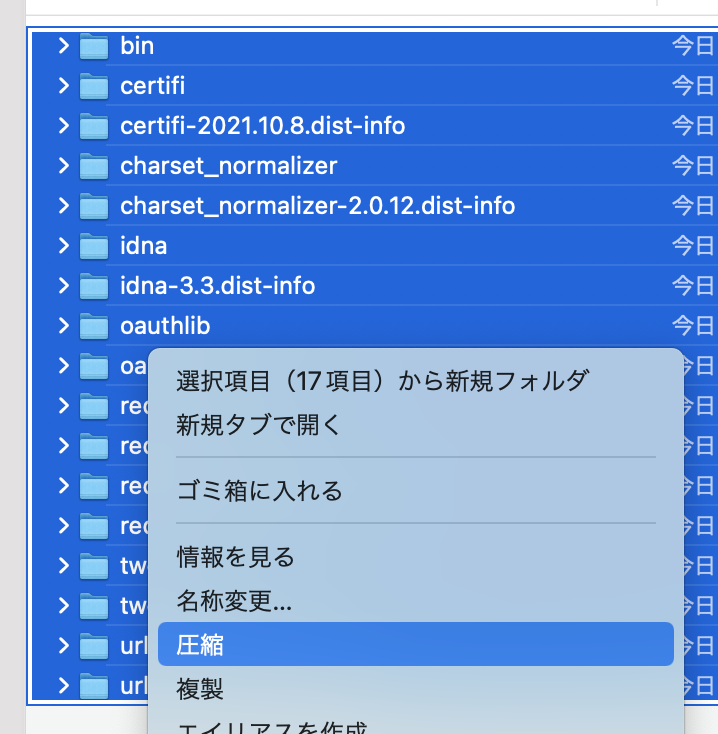
pip3 install tweepy -t ./tweepy/以下の内容の「lambda_function.py」を「tweepy」フォルダ内に作成。
def lambda_handler(event, context):
    # TODO implement
    print('test lambda...')

    return {
        'statusCode': 200,
        'body': json.dumps('Hello from Lambda!')
    }
以下のように「tweepy」フォルダ内を全選択して「圧縮」。
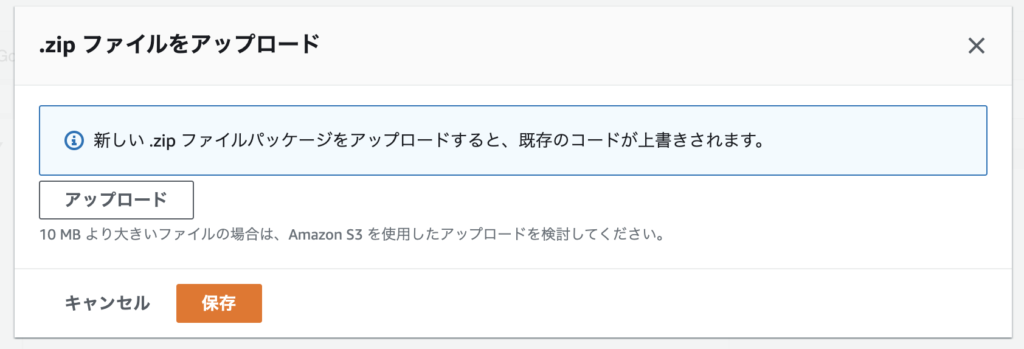
Lambdaに戻り、「コード」の「アップロード元」から「.zipファイル」を選択。

先ほど圧縮したファイルをアップロード。
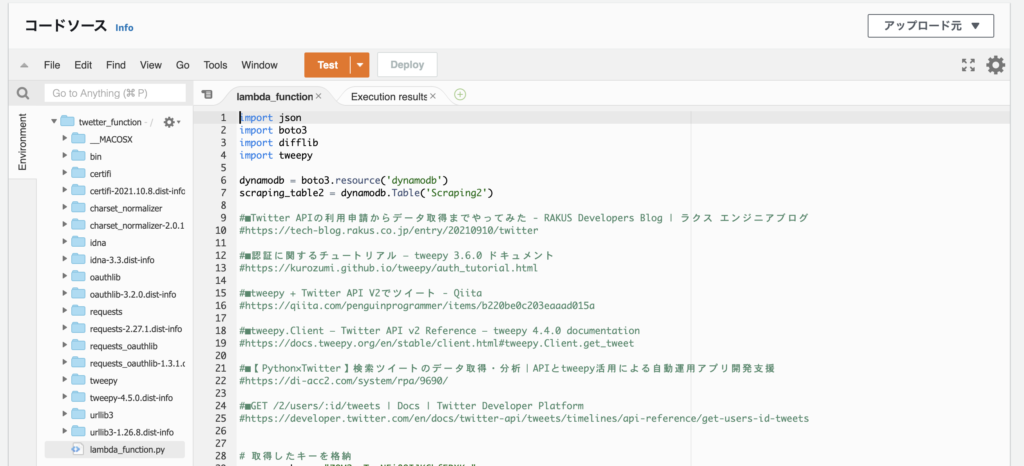
このようにTweepyライブラリがインポートされる。
取得したいユーザーのTwetterIDを取得
最初は、ツイートIDからユーザーIDを取得していた。
(あるツイートURL)
https://twitter.com/morimotoshoji/status/1488060203316629504
(後ほど述べる前処理)
tweet_id = '1488060203316629504'
GetTwt = client.get_tweet(id=int(tweet_id), expansions=["author_id"], user_fields=["username"])
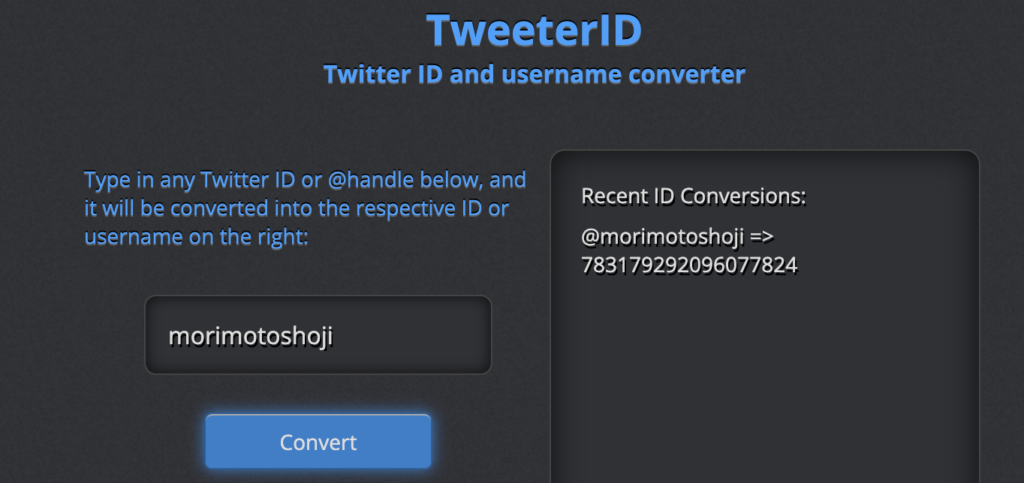
print( GetTwt.includes["users"][0].id )少し調べるとサイト上で調べることができることがわかった。この数字をメモしておく。
Lambda3を追加
以下のソースでLambda関数を新たに作成する。以前の記事の通りなので詳細は割愛。DynamoDBに、「Scraping2」テーブルを作成している前提。Lambda名は「twetter_function」、一般設定のタイムアウトは「30秒」とした。ロールに、「AmazonDynamoDBFullAccess」をアタッチするのを忘れずに。
長々と書いているが、ツイートを取得しているのは以下の3行。
client = tweepy.Client(bearer_token, api_key, api_key_secret, access_token, access_token_secret)
        buf = client.get_users_tweets(user_id, max_results=10, exclude=["replies"])
        tweets_data = buf.data
Max10件を取得し、返信ツイートは除いている。以下全文を記載。
import json
import boto3
import difflib
import tweepy

dynamodb = boto3.resource('dynamodb')
scraping_table2 = dynamodb.Table('Scraping2')

api_key = "xxxxxxxxxxxxxxxxxxxxxxxxx"
api_key_secret = "xxxxxxxxxxxxxxxxxxxxxxxxx"
access_token = "xxxxxxxxxxxxxxxxxxxxxxxxx"
access_token_secret = "xxxxxxxxxxxxxxxxxxxxxxxxx"
bearer_token = "xxxxxxxxxxxxxxxxxxxxxxxxx"


def lambda_handler(event, context):

    mail = 'twinkangaroos@gmail.com'

    contents_name = ['namikishida', 'NikkeixTREND']
    user_id = ['145078040', '30209617']

    for i in range(len(user_id)):
        state = main(mail, contents_name[i], user_id[i])
        if state == False:
            return {
                'statusCode': 200,
                'body': json.dumps('Process aborted becaouse an error occurred. ' + contents_name[i])
            }

    return {
        'statusCode': 200,
        'body': json.dumps('Hello from Lambda!')
    }


def main(mail, contents_name, user_id):

    file_contents = ''
    state = ''
    exist_contents = ''

    try:
        #Get existing data
        exist_data = scraping_table2.get_item(
            Key={
                'Mail': mail,
                'ContentsName': contents_name
            }
        )
        exist_contents = exist_data['Item']['Contents']

    except KeyError:
        print('Not found data. OK. Insert new data.')
    except Exception as e:
        print('Select DB Error!!!')
        print(e)
        return False

    file_contents = scraping_tweets(contents_name, user_id)
    if file_contents == False:
        return False

    try:
        if file_contents != exist_contents:
            print('changed!')
            state = 'changed!'
            res = difflib.ndiff(exist_contents.split(), file_contents.split())
            sabun = ''
            for r in res:
                if r[0:1] in ['+']:
                    sabun = sabun + r + '\n'

            #if the data has been altered,
            response = scraping_table2.put_item(
                Item={
                    'Mail': mail,
                    'ContentsName': contents_name,
                    'UpdateFlag': 1,
                    'Contents': file_contents,
                    'Sabun': sabun,
                    'URL': 'https://twitter.com/' + contents_name,
                    'Selecter': ''
                }
            )
        else:
            print('same...')
            state = 'same...'

    except Exception as e:
        print('Insert(Update) Error!!!')
        print(e)
        return False

    return state

#Get data by scraping tweets.
def scraping_tweets(contents_name, user_id):

    file_contents = ''

    try:
        client = tweepy.Client(bearer_token, api_key, api_key_secret, access_token, access_token_secret)
        buf = client.get_users_tweets(user_id, max_results=10, exclude=["replies"])
        tweets_data = buf.data

        for tweet in tweets_data:
            url = 'https://twitter.com/' + contents_name + '/status/' + str(tweet.id)
            file_contents += url + "\n" + tweet.text + "\n\n"

        if file_contents == '':
            print('not found tweets...')
            return False

    except Exception as e:
        print('Scraping Error!!! ' + contents_name)
        print(e)
        return False

    return file_contents
Lambda2を修正
冒頭の「contents_name」「contents_flag」「sabun_flag」に今回の値を追加する。冗長だが全ソースを掲載する。
import json
import boto3

sns_client = boto3.client('sns')
dynamodb = boto3.resource('dynamodb')
scraping_table2 = dynamodb.Table('Scraping2')
sns_client = boto3.client('sns')

def lambda_handler(event, context):

    mail = 'twinkangaroos@gmail.com'
    contents_name = ['Fujii', 'Kyoko', 'namikishida', 'NikkeixTREND']
    contents_flag = [True, True, True, True]
    sabun_flag = [True, True, False, False]

    for i in range(len(contents_name)):
        state = main(mail, contents_name[i], contents_flag[i], sabun_flag[i])
        if state == False:
            return {
                'statusCode': 200,
                'body': json.dumps('Process aborted becaouse an error occurred. ' + contents_name)
            }

    return {
        'statusCode': 200,
        'body': json.dumps('The Notify process is complete.')
    }

def main(mail, contents_name, contents_flag, sabun_flag):

    update_flag = 0
    contents = ''
    sabun = ''
    url = ''
    selecter = ''

    # Check it has been updated.
    try:
        #Get existing data
        exist_data = scraping_table2.get_item(
            Key={
                'Mail': mail,
                'ContentsName': contents_name
            }
        )
        update_flag = exist_data['Item']['UpdateFlag']
        contents = exist_data['Item']['Contents']
        sabun = exist_data['Item']['Sabun']
        url = exist_data['Item']['URL']
        selecter = exist_data['Item']['Selecter']

    except KeyError:
        print('Not found data. OK. Do nothing.')
    except Exception as e:
        print('Select Error!!!')
        print(e)
        return False

    if update_flag != 1:
        print('No change, so normal termination.')
        return True

    print('change!')

    body = contents_name + '\n\n' + url + '\n\n'
    if contents_flag == True:
        body = body + contents + '\n\n'
    if sabun_flag == True:
        body = body + sabun + '\n\n'

    # Email notification as it is updated.
    sns_client.publish(
        TopicArn='arn:aws:sns:ap-northeast-1:317057939332:NotifyScraping',
        Message='The website has been updated as a result of scraping. ' + '\n\n' + body
    )

    # Reset the UpdateFlag.
    try:
        response = scraping_table2.put_item(
            Item={
                'Mail': mail,
                'ContentsName': contents_name,
                'UpdateFlag': 0,
                'Contents': contents,
                'Sabun': sabun,
                'URL': url,
                'Selecter': selecter
            }
        )

    except Exception as e:
        print('Insert(Update) Error!!!')
        print(e)
        raise False

    return True
Step FunctionsにLambdaを追加
過去に作ったStep FunctionsにLambdaを1つ追加する。過去の記事はこちら。
■AWS Lambdaで定期的にスクレイピングする方法(その1:Step Functions編)
https://twinkangaroos.com/how-to-use-aws-lambda-for-periodic-scraping-1.html
■(その2:Amazon EventBridge編)
https://twinkangaroos.com/how-to-use-aws-lambda-for-periodic-scraping-2.html
■(その3:Lambda・DynamoDB・Simple Notification Service編)
https://twinkangaroos.com/how-to-use-aws-lambda-for-periodic-scraping-3.html
以下の設計で進める。
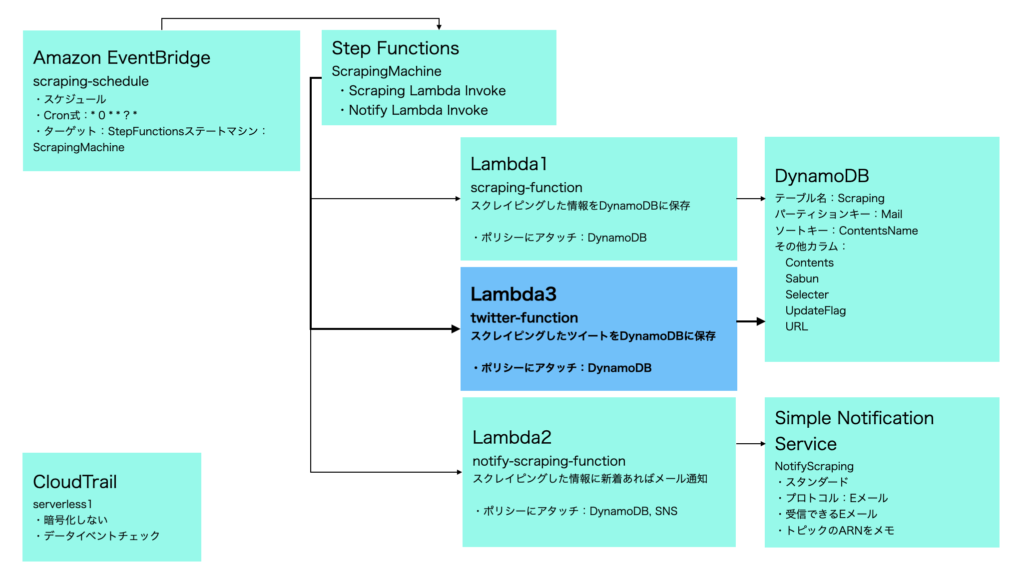
前回と同様のため、詳細は割愛する。最終以下になる。
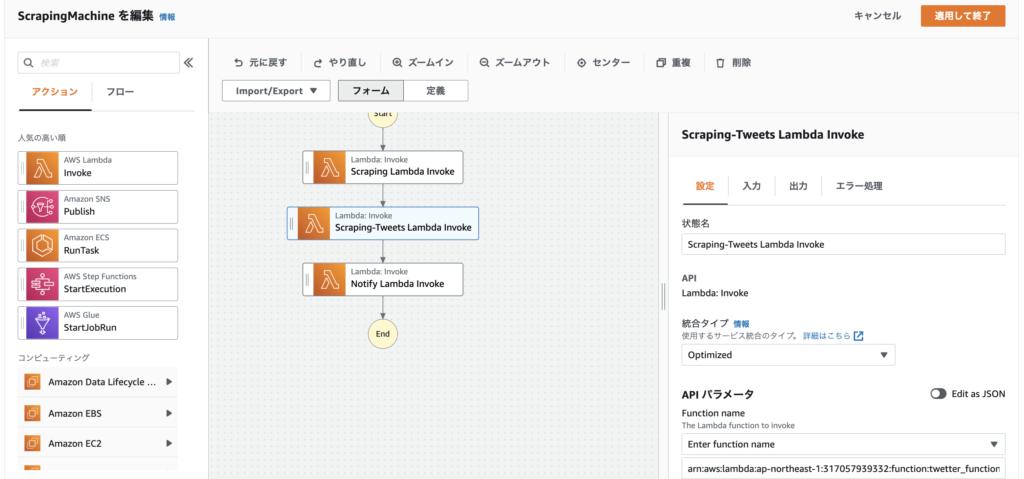
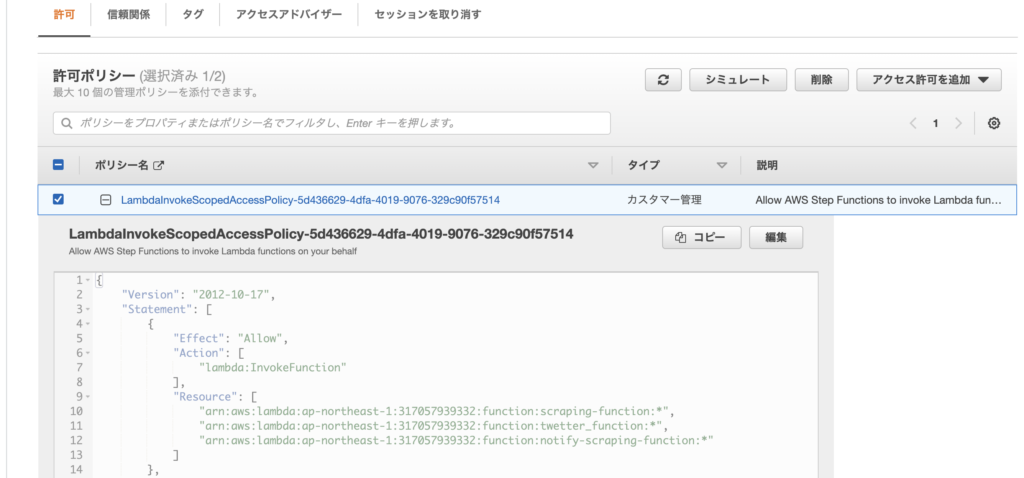
Lambda関数を追加した後、Step Functionsの「詳細」「IAM ロール ARN」の「LambdaInvokeScopedAccessPolicy-5d436629-4dfa-4019-9076-329c90f57514」リンクをクリック→「ポリシーの編集」で対象のLambda関数を手動で追加することも忘れずに。
メール通知イメージ
私の場合、毎日9時・12時・18時・22時に以下のような通知メールが届く。

今年の2/6(約1ヶ月前)から毎日メールが届くようになった。気づいた点は以下の通り。
1)Twitterを見ることが少なくなった。通知メールから見たい時だけ見るようになりストレスフリー。
2)画像は表示できず文章だけとなり非常に味気ないため、ヘビーユーザーには向いていない。
3)同一ユーザーからのツイートをまとめてみると、自分にとって必要な情報かどうかの見極めがしやすい。
今回想定の検索ワード
”Lambda Twitter スクレイピング”